How to Build a Shed Foundation: Complete Guide
Learn the essential steps to create a solid, level foundation for your garden shed. Covers concrete slabs, timber bearers, and paving options with step-by-step instructions.

A solid, level foundation is the most critical element of any shed build. Without proper groundwork, your shed will suffer from structural issues, water ingress, and premature decay. This comprehensive guide covers the three most popular foundation methods for garden sheds in the UK.
Check if your shed requires planning permission. In the UK, sheds under 2.5m in height and not covering more than 50% of your garden typically fall under permitted development rights.
Choosing Your Foundation Type
The right foundation depends on several factors including your shed size, ground conditions, budget, and how permanent you want the installation to be.
| Foundation Type | Best For | Difficulty | Cost |
|---|---|---|---|
| Concrete Slab | Large sheds, workshops, permanent installations | Hard | £££ |
| Timber Bearers | Medium sheds, slightly uneven ground | Medium | ££ |
| Paving Slabs | Small to medium sheds, easy DIY option | Easy | £ |
Tools and Materials You'll Need
Essential Tools
- Spirit level (ideally 1.2m long)
- Tape measure (5m minimum)
- Spade and shovel
- Rake
- Wheelbarrow
- String line and wooden pegs
- Rubber mallet
- Builder's square
Common Materials
- Hardcore or MOT Type 1
- Sharp sand
- Weed membrane
- Treated timber (for bearers)
- Concrete mix (for slab)
- Paving slabs (for slab base)
Ground Preparation
Proper ground preparation is essential regardless of which foundation type you choose. Taking time at this stage will save problems later.
Step 1: Mark Out the Area
Your foundation should extend at least 50mm beyond the shed dimensions on all sides. Use string lines and wooden pegs to mark out a perfect rectangle.
Measure diagonally from corner to corner. If both measurements are equal, your rectangle is square. This is crucial for a proper shed fit.
Step 2: Clear and Level
Remove all vegetation, including grass and roots, from the marked area. Excavate to a depth of approximately 100-150mm for most foundation types.
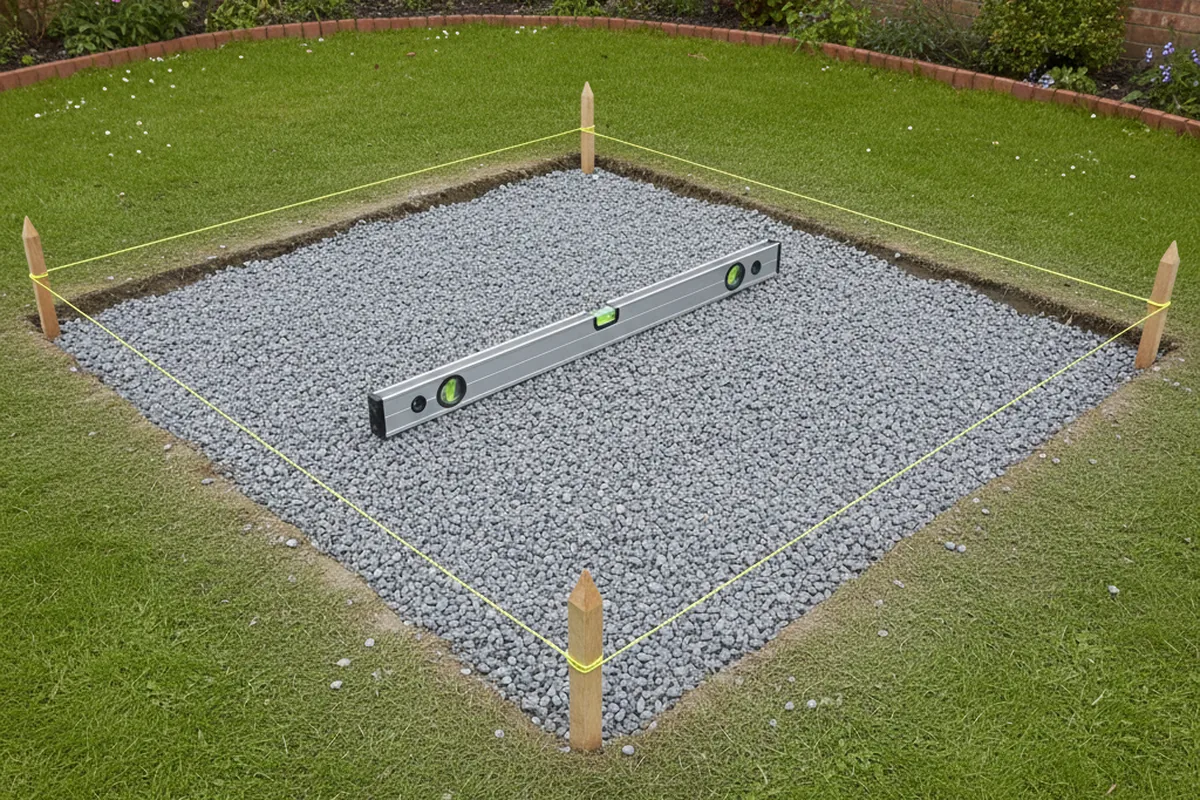
Step 3: Add Weed Membrane
Lay weed membrane across the entire excavated area. This prevents vegetation growing up through your foundation. Overlap sheets by at least 150mm.
Method 1: Concrete Slab Foundation
A concrete slab provides the most permanent and sturdy foundation. It's ideal for larger sheds, workshops, or anywhere you need a solid floor.
Laying the Sub-base
- Add hardcore - Spread 75-100mm of MOT Type 1 or crushed hardcore across the excavated area.
- Compact thoroughly - Use a plate compactor or hand tamper to create a solid, stable base. The surface should not move when walked on.
- Check levels - The sub-base should be roughly level but with a very slight fall (1:60) away from any adjacent buildings for drainage.
Building the Formwork
Create a timber frame to contain the concrete using 25mm thick boards. The formwork should be the exact finished size of your foundation.
Pouring the Concrete
For a standard shed foundation, use a C20 concrete mix at a depth of 75-100mm. For larger sheds or workshops, consider 100-150mm with steel mesh reinforcement.
Allow concrete to cure for at least 48 hours before building on it, and avoid installing heavy items for at least 7 days. In cold weather, curing may take longer.
Method 2: Timber Bearer Foundation
Timber bearers are an excellent choice for medium-sized sheds. They allow air circulation beneath the shed (reducing damp) and can be adjusted for uneven ground.
Choosing Your Timber
Use pressure-treated softwood bearers, minimum 75mm x 50mm. For larger sheds, consider 100mm x 75mm. The timber must be rated for ground contact (Use Class 4).
Layout Pattern
Space bearers at maximum 400mm centres. They should run perpendicular to the shed floor joists for proper support distribution.
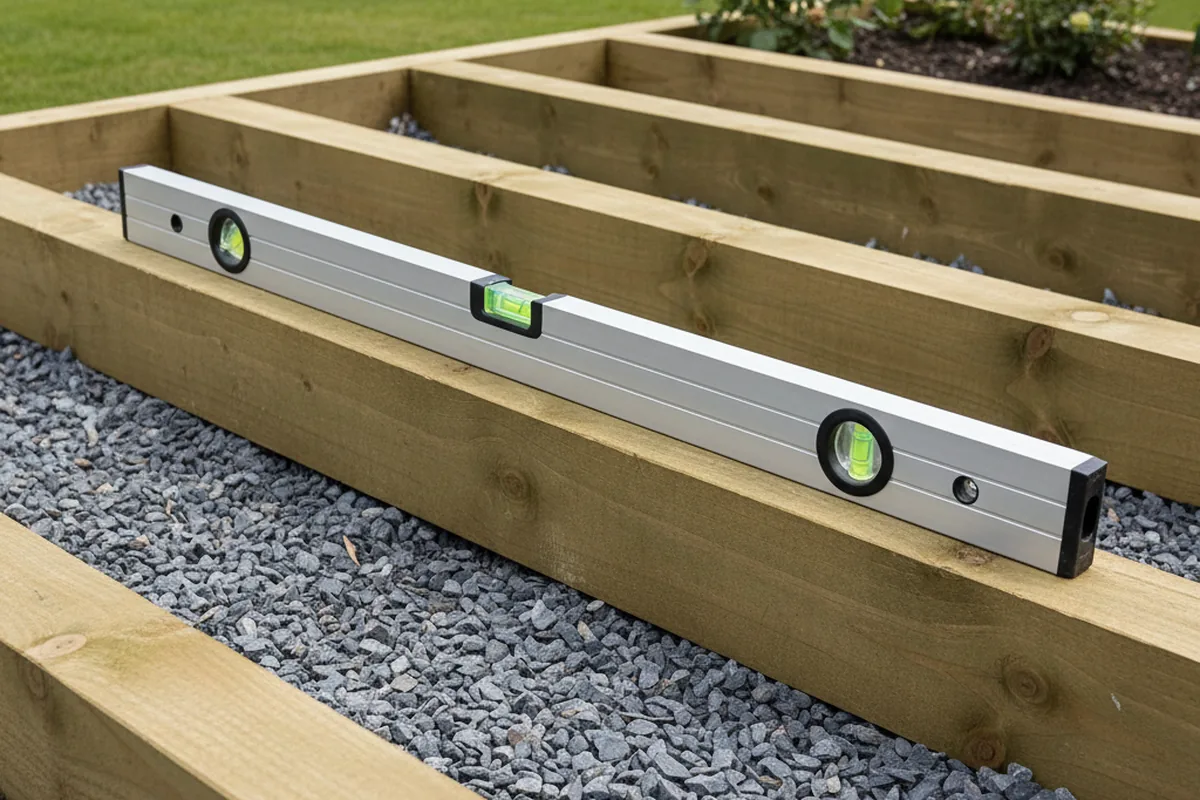
Levelling the Bearers
- Lay bearers on a compacted gravel or sand bed
- Use a long spirit level to check across multiple bearers
- Adjust by adding or removing sand beneath each bearer
- Re-check after adjustments as one change can affect others
Method 3: Paving Slab Foundation
Paving slabs offer a quick, affordable foundation for smaller sheds. They're easy to lay and can be repositioned if needed.
Slab Selection
Use 450mm x 450mm or 600mm x 600mm concrete paving slabs, minimum 35mm thick. Avoid decorative slabs as they may crack under load.
Laying the Slabs
- Prepare the base - Lay 50mm of sharp sand over your compacted hardcore sub-base.
- Position corner slabs first - Start with the corners, using string lines to maintain straight edges.
- Level each slab - Tap down with a rubber mallet, checking with a spirit level. Add or remove sand as needed.
- Fill the gaps - Complete the remaining slabs, leaving 3-5mm gaps which can be filled with kiln-dried sand.
Common Mistakes to Avoid
Always make your foundation at least 50mm larger than the shed on all sides. This provides a water run-off edge and room for adjustment.
Insufficiently compacted sub-base will settle over time, causing your shed to become unlevel. Take time to compact properly.
Water pooling around your shed leads to rot. Ensure slight drainage fall and consider adding a French drain if ground is prone to waterlogging.
Summary
A well-built foundation is essential for the longevity of your shed. Choose the right type based on your needs:
- Concrete slab for permanent, heavy-duty installations
- Timber bearers for good ventilation and adjustability
- Paving slabs for quick, budget-friendly projects
Whichever method you choose, take time to prepare the ground properly and ensure everything is level. Your future self will thank you!
Ready to Build Your Shed?
Use our free shed builder tool to design your perfect shed and get a complete materials list including foundation requirements.
Start Building Now